I Love You Hand Clay Project
I Love You Hand Clay Project
Refer to Clay Guide lines
Printable PDF Hand project
Supplies:
wooden skewer
small bowl of water (sponge optional)
heart cookie cutter
letter stamps
straw (for punching hole)
circle template (7 inches)
clay mat
Prep:
Roll clay to 1/4 inch thick the using clay roller.
Using a wooden skewer and 7 inch circle template, cut out one circle per student.
This can be done with the students individually as well.
With Students:
Pull one student per parent volunteer (4-5 volunteers is helpful to speed up process, perhaps the other students can be reading with teacher).
Place circle slab of clay on top of clay mat.
Place student's hand on top of clay.
Trace each child's hand using the wooden skewer, pressing through to the clay mat.
Reserve bottom of palm for when the child has removed their hand.
Carefully separate the hand from the surrounding clay and carve the student's name lightly into the back of the hand.
Remove clay crumblies with tip of skewer or fingers.
Use wet finger or damp sponge to smooth edges of hand. (option: this can be done with student)
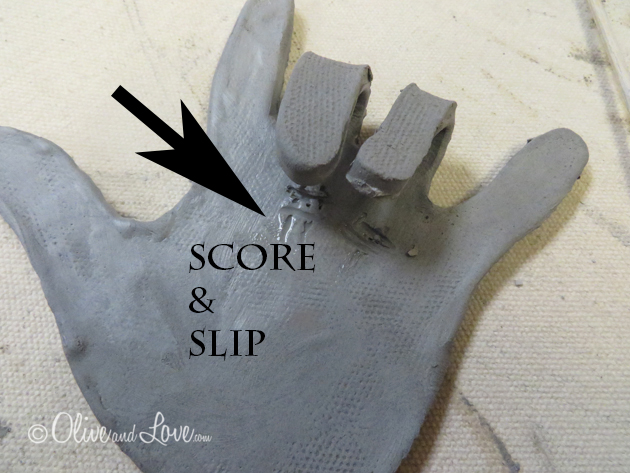
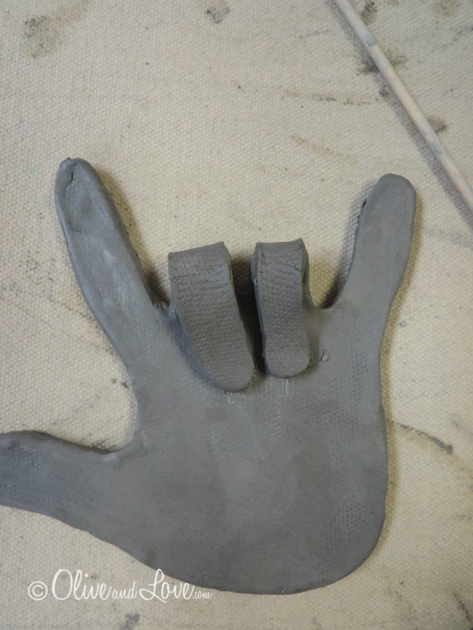
Carefully fold middle two fingers down to palm of clay hand, leaving space under them for hanging later with ribbon.
Using scoring technique, make small hatch marks with skewer onto palm where the fingers will touch.
Place a small amount of water over hatch marks (which creates 'slip') and slightly wiggle fingers onto palm until they feel secure.
Note: the “knuckles” may have slight cracks in clay so smooth this using a wet finger or damp sponge.
Using wet finger or damp sponge smooth edge of negative hand shape.
Student can help add initial stamps.
Punch hole at top of circle using straw.
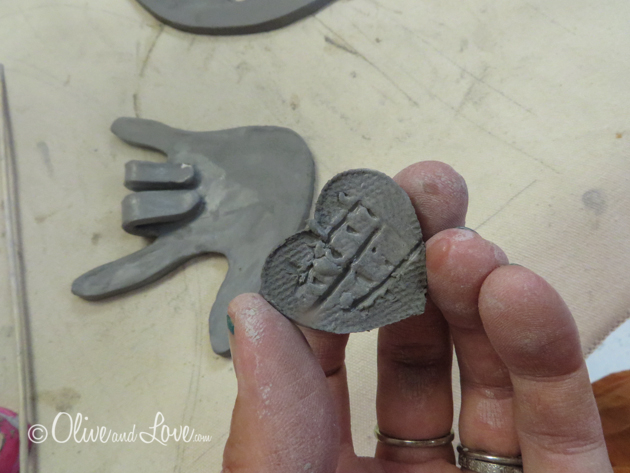
Heart Option: Using extra 1/4 inch pre-rolled clay, cut out heart.
Place heart on palm of hand using the same scoring technique as with fingers.
Hanging Option: hang from string tied through space under fingers or punch hole with straw through finger.
Glazing:
White, clear and red glazes are popular choices for this project.
Solid colors are easiest for this younger age group.
Students can be given clear glaze for hands and later, the parent volunteer can paint the heart red.
As pictured above, top left is clear, top right is red, bottom left is clear with red heart, bottom right is white with red heart.


