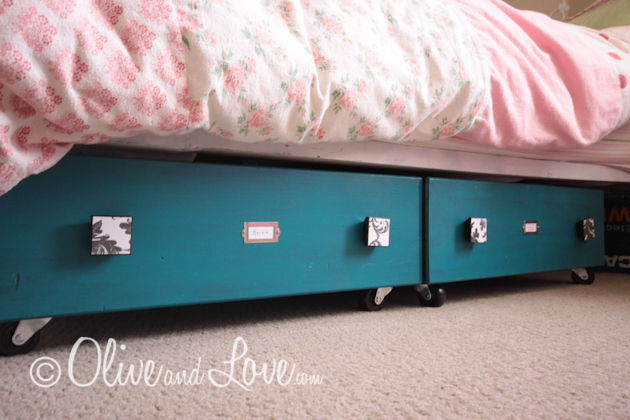
Upcycled Dresser Drawers For Under Bed Storage
Just a warning....I LOVE how these drawers turned out. BUT it was one of those projects that took forEVer because I kept loosing motivation and finding myself tripping over stacks of drawers laying around the house...
Besides using them as storage under a bed, drawers on casters would work well under an entry bench for shoes, and under the coffee table for blankets or toys, etc.
I started with a basic dresser. This one has some history with my family but was fairly beat up and out of shape. I gave it a good wash with Murphy's Oil soap and warm water.
[googlead]
(above photo from pumpkins)
After allowing the wood to dry thoroughly, I sprayed it with Zinsser Primer. I had never completed a piece of furniture exclusively with spray paint and I was ready to attempt it. Spraying is pretty quick, and if you have the space and weather for it, it can be very handy. The clean up of oil based primers is rather obnoxious so that's another plus with spray. Another tip?....Use acetone to clean your trigger finger when you're done...it works great. (Thanks Ari)
I neglected to get a shot of the drawers with their TWO coats of zinsser primer before starting the first coat of lagoon Rustoleum.
Lagoon is one of my favorites. I've used it on various candle sticks in the past. [googlead]
In between primer coats and Lagoon coats, I lightly sanded the wood with 425 grit sand paper. I love my handheld sander device for this. Thanks Grandpa!
The drawers took about three coats of Lagoon. I say "about" because there may have been a fourth in spots. I did not spray the bottoms but gave them a fun graffiti heart. After the paint was completely dry, I added a brown glaze. 25% dark brown paint to 75% glazing medium. Click here to read about glazing in another post.
The next step was cut scrapbook paper to line the drawers. I cut the big 12" paper into fourths so they would fit the sides. For continuity, I used the fourths on the bottom of the drawers as well (even though a full sheet would fit). [googlead]
I brushed the drawer with Mod Podge in small sections the size of the cut scrapbook paper. After adhering the paper to the drawer, I brushed the Mod Podge over the top of the paper. I only used one coat, but two would have been better. Frankly this project was taking a bit longer then I had estimated and at this point in the game I was "over it."
I also Mod Podged scrapbook paper to the handles after painting them black.
After the Mod Podge was dry, we (okay......Dan) drilled holes in the bottom of the drawers to attach the casters.
Check out the casters I got on Amazon:

Next I measured the drawer for the metal label. I wasn't paying much attention to the size of the labels I bought and I think they look great, but would probably look better slightly larger.

Here is a link to the labels:

[googlead]
They turned out super cute. Even though it was a bit of a lengthy project.
[googlead]
They fit perfectly under daughter 2.0's bed.

Their labels are perfect to help keep her toys organized.
[googlead]


