Mission Organization: Slide-A-Shelf

20120825-IMG_3745 copy
station
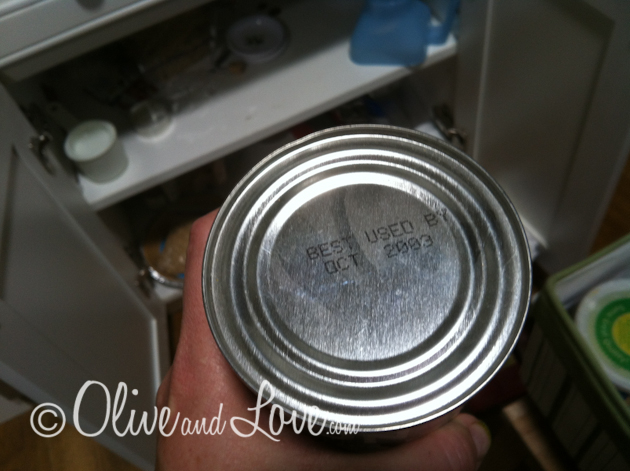
In an attempt to tame the chaos (that is my life), I've always wanted pull out shelves in one of my kitchencabinets. This cabinet in particular used to house my baking goods. I would access the first four inches on a regular basis but anything further back was no man's land. If you follow me Facebook you may remember the photo I posted of a can of blueberries that expired in 2003:
20120608-IMG_5161
2003! That means I moved three times with this expired can. In June I moved all of my baking goods to my pantry, opening up this two shelved cabinet in downtown kitchenville. It housed a couple bowls for the past few months but it's ultimate goal was to be a highly functioning, accessible and organized storage system for.... making lunches.
I thought perhaps I could walk right into the hardware store and buy some sort one size fits all pull out shelf. No...not worth it. Go for the custom built. In the organization aisle at Lowes they had a pad of fliers for Slide-A-Shelf. I grabbed one, followed the instructions online for ordering, went on vacation for a week and returned to a box of ready to assemble sliding shelves!

saslogo
Let me be totally clear that I ordered these shelves and installed them completely on my own. Dan doubted my ordering skills, so I was pleased to have these completely installed by the time he returned from a business trip. (Let me also say that I am not being paid to endorse this company, but I do recommend them).
20120824-IMG_3729
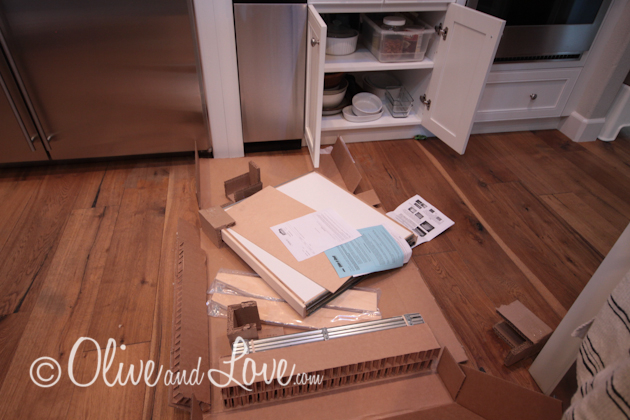
I opened the box and laid it all out in front of me. Everything was packaged neatly and the instructions were very thorough.
[googlead]

20120824-IMG_3730
Step one is to slip the top of the back into the back of the drawer, matching the codes.
20120824-IMG_3732
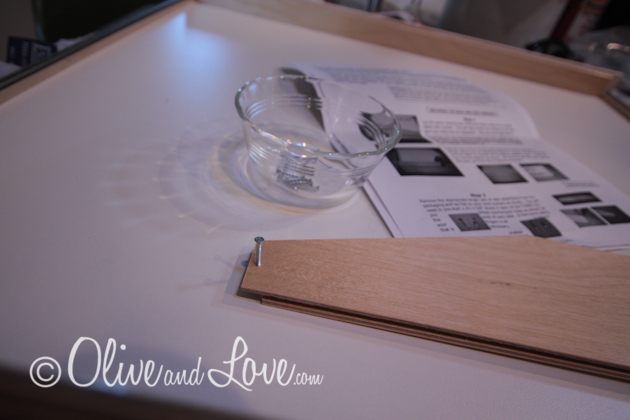
After placing my screws in a bowl, I carefully stuck the small screws in the existing holes of the sides of the drawers.

20120824-IMG_3740
Applying pressure to the top of the front of the drawer, I drilled in the screws. A small drill bit was included with the shelves (always a plus to not go rummaging through the garage when you just want to screw!)
[googlead]
20120824-IMG_3741
Lay the metal slides on the shelf using the included template to measure their width. Drill the screws in the holes carefully with out bumping them.
20120824-IMG_3743
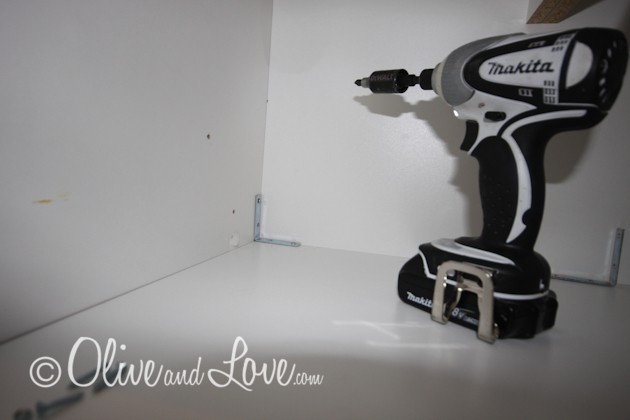
When attaching a slide-a-shelf to an existing shelf, the company suggests adding supportive L brackets in the back of the shelf.

20120824-IMG_3744
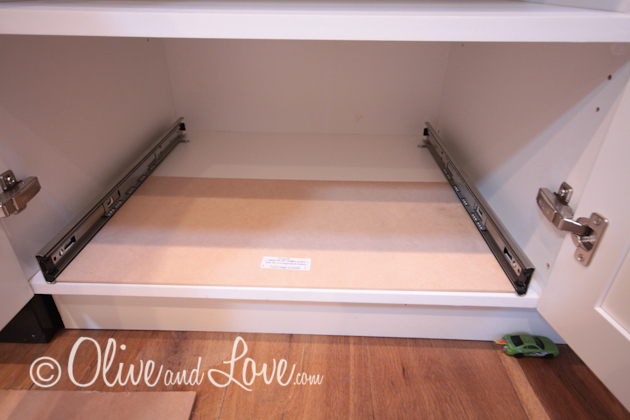
The shelves pop into the metal slides as easy as matching up the sides and popping it in. Similar to removing and returning a kitchen drawer into it's existing space.

20120825-IMG_3745
Both shelves took about an hour total. It's hard to tell exactly how much time they really took in-between making breakfast, wiping tooshies and trying to help my father locate a key in the garage that was previously hidden by my husband.

20120825-IMG_3746
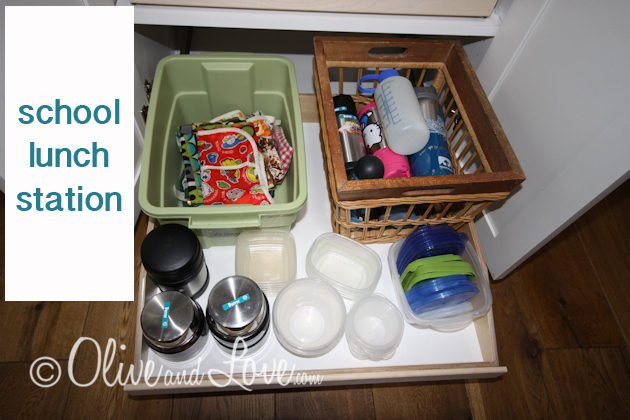
Packing lunch is my absolute favorite thing to do in the whole world. Not. Compared to the one small drawer that housed random lids and containers, cloth sandwich wraps and pieces of thermoses with lunch bags getting stuck back behind.....yada yada....you can imagine. This makes for a much more pleasant experience.

20120825-IMG_3747
The top drawer holds the lunch boxes, the ingredients to my morning smoothie (more details later) a container of wet naps from Buffalo Wild Wings and a random basket of seldom used baking utensils.
I have been "meaning to do this" for about five years. It was so worth it and is everything and more I could have ever dreamed of...
[googlead]

20120825-IMG_3749
Here's a peak at the airport waiting area that was made from the packaging.